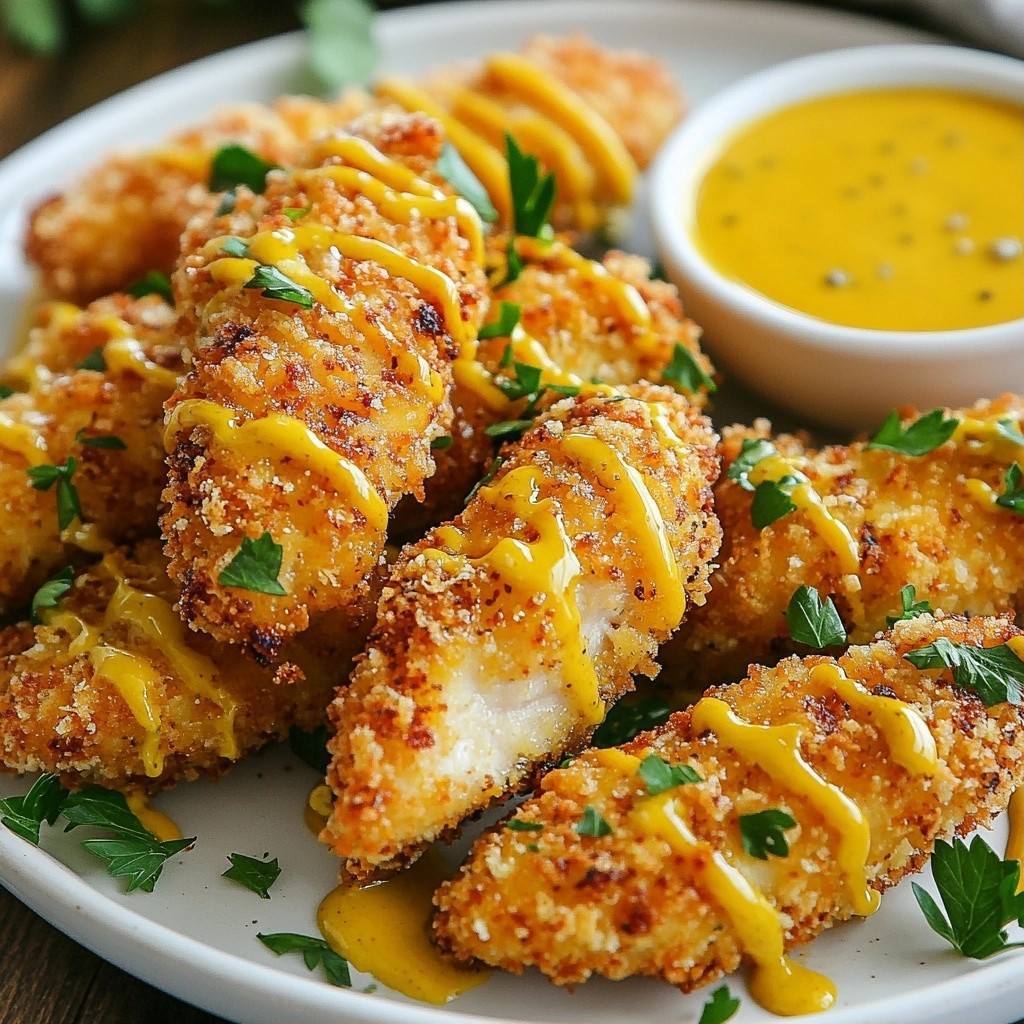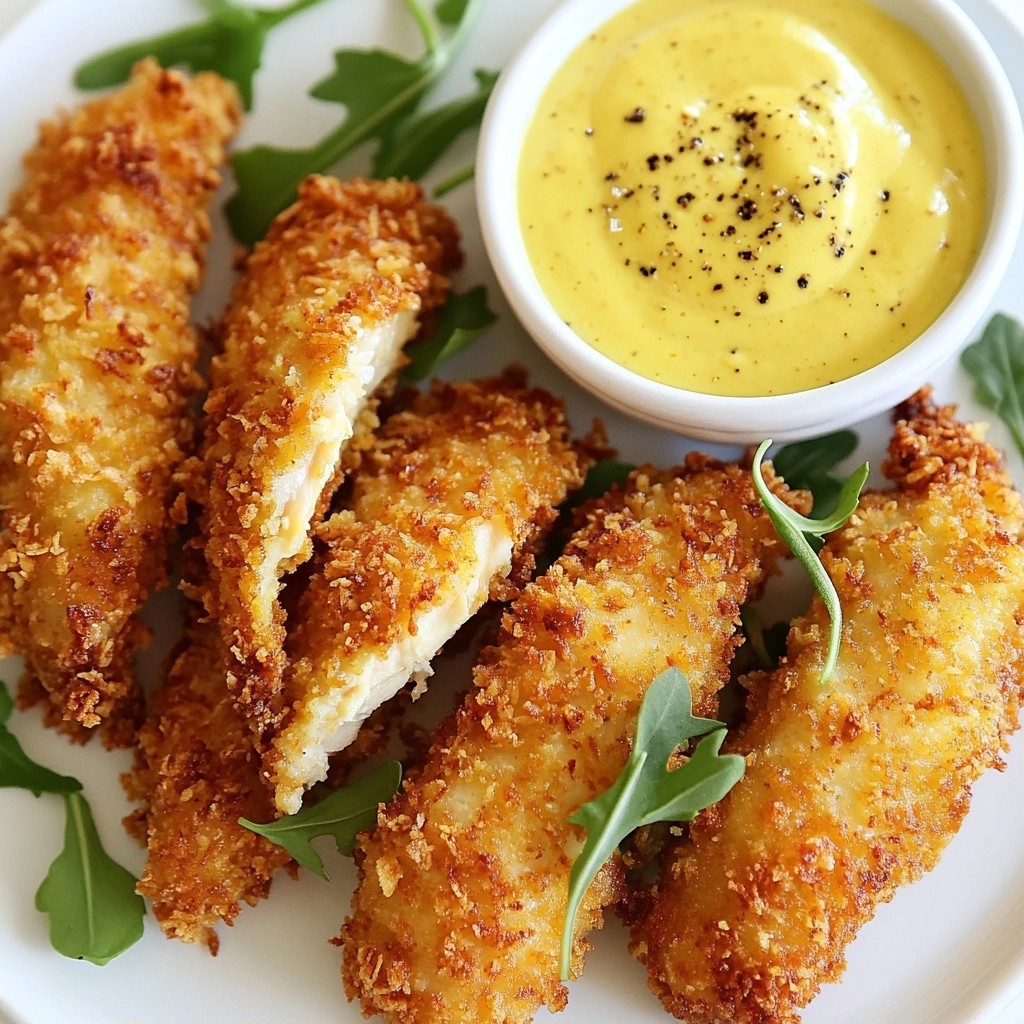
Craving something crunchy and delicious? Dive into my Crispy Chicken Tenders with Honey Mustard Dip Delight! In this guide, you'll learn how to make juicy chicken tenders plus a sweet and tangy dip that pairs perfectly. I'll share simple ingredients, clear instructions, and clever tips to ensure your dish is a hit. Get ready to impress your friends and family with this fun recipe that’s easy to whip up at home!
Why I Love This Recipe
- Crispy Texture: The panko breadcrumbs create a delightful crunch that makes these chicken tenders irresistible.
- Flavorful Marinade: Soaking the chicken in buttermilk infuses moisture and tenderness, ensuring a juicy bite every time.
- Easy to Make: This recipe is straightforward and perfect for home cooks of all skill levels, making weeknight dinners a breeze.
- Perfect Pairing: The honey mustard dip adds a sweet and tangy contrast, elevating the chicken tenders to a whole new level.
Ingredients
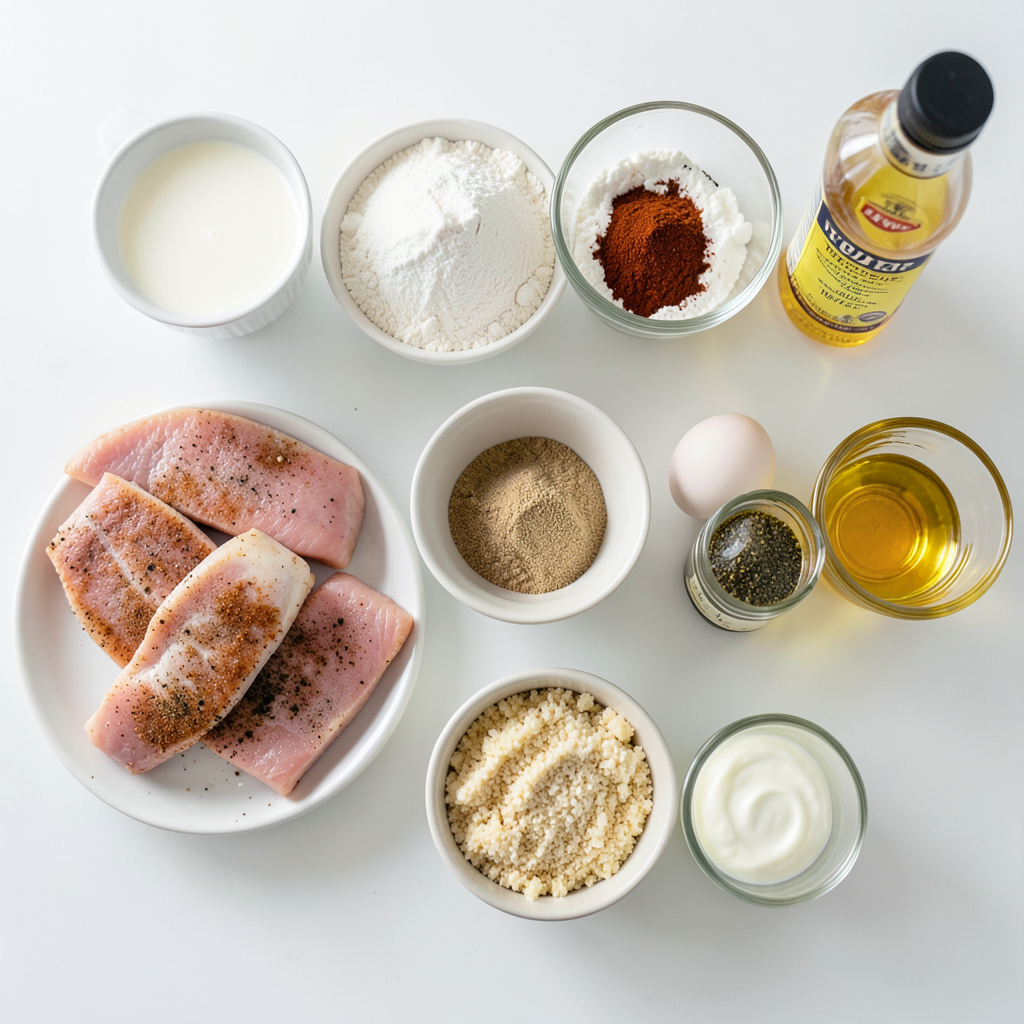
Main Ingredients for Chicken Tenders
To make crispy chicken tenders, you need these main ingredients:
- 1 lb chicken breast tenders
- 1 cup buttermilk
- 1 cup all-purpose flour
- 1 teaspoon garlic powder
- 1 teaspoon onion powder
- 1 teaspoon smoked paprika
- 1 teaspoon salt
- ½ teaspoon black pepper
- ½ teaspoon cayenne pepper (optional for heat)
- 2 large eggs
- 1 cup panko breadcrumbs
- Vegetable oil (for frying)
The chicken breast gives a nice, lean bite. Buttermilk makes the chicken tender and juicy. The flour and seasonings create a great coating. Panko breadcrumbs add the perfect crunch.
Ingredients for Honey Mustard Dip
The honey mustard dip is simple yet tasty. You will need:
- ½ cup Greek yogurt
- 2 tablespoons honey
- 2 tablespoons Dijon mustard
- 1 tablespoon apple cider vinegar
- Salt and pepper to taste
This dip is creamy and tangy. It pairs well with the crispy tenders!
Optional Ingredients for Extra Flavor
For those who want to add more flavor, consider these options:
- Fresh herbs like parsley or chives
- A dash of lemon juice for zest
- A sprinkle of chili powder for more heat
These extra ingredients can make your dish even more special. Feel free to mix and match!
Step-by-Step Instructions
Marinating the Chicken Tenders
To start, marinate the chicken tenders in buttermilk. This step is key. It makes the chicken juicy and tender. Place the tenders in a bowl. Pour in 1 cup of buttermilk. Cover and chill in the fridge for at least 30 minutes. For best results, let them soak overnight. This extra time gives the chicken more flavor and tenderness.
Coating the Chicken Tenders
Now, let’s coat the chicken tenders. First, mix the dry ingredients. In a shallow dish, combine 1 cup of all-purpose flour, 1 teaspoon of garlic powder, 1 teaspoon of onion powder, 1 teaspoon of smoked paprika, 1 teaspoon of salt, ½ teaspoon of black pepper, and ½ teaspoon of cayenne pepper if you like heat. In another bowl, whisk 2 large eggs until smooth.
Next, take the marinated tenders out of the buttermilk. Let the excess buttermilk drip off. Dip each tender into the flour mix. Make sure to cover it well. Then, move it to the egg mixture. Finally, coat it in panko breadcrumbs. Press the breadcrumbs firmly onto the chicken. This makes the coating extra crispy.
Frying the Chicken Tenders
Now, it’s time to fry the chicken tenders. Heat about ½ inch of vegetable oil in a large skillet over medium-high heat. You want it hot but not smoking. To check, drop in a piece of bread. If it sizzles, the oil is ready. Fry the tenders in batches. Cook about 3-4 tenders at a time for 3-4 minutes on each side. Look for a golden brown color. Use a meat thermometer to check for doneness. The chicken should reach an internal temperature of 165°F.
Once cooked, transfer the tenders to a plate lined with paper towels. This helps absorb extra oil. Enjoy them hot with your honey mustard dip!
Tips & Tricks
Best Practices for Perfectly Crispy Tenders
To make your chicken tenders crispy, follow these key steps:
- Marinate well: Soak the chicken in buttermilk. This adds flavor and moisture.
- Use panko breadcrumbs: Panko gives a crunchier texture than regular breadcrumbs.
- Heat your oil: Ensure the oil is hot enough before frying. This helps create a crispy crust.
- Don’t crowd the pan: Fry a few tenders at a time. Too many will lower the oil's temperature.
How to Avoid Common Mistakes
Here are some common pitfalls to avoid:
- Skipping the marination: Without buttermilk, the chicken may be dry.
- Not pressing the breadcrumbs: Press them firmly onto the chicken. This ensures they stick.
- Overcrowding the skillet: Fry in batches to keep the oil hot. This prevents soggy tenders.
- Frying at low heat: This can lead to greasy chicken. Always aim for medium-high heat.
Suggested Cooking Tools
Having the right tools makes cooking easier:
- Large skillet: For frying the tenders evenly.
- Meat thermometer: To check if the chicken reaches 165°F.
- Shallow dishes: Use these for the flour, eggs, and breadcrumbs. It helps with the coating process.
- Paper towels: For draining excess oil from the cooked tenders.
These tips will help you create the crispiest chicken tenders with a delicious honey mustard dip! Enjoy the cooking process and have fun experimenting.
Pro Tips
- Marinate for Maximum Tenderness: The longer you marinate the chicken in buttermilk, the more tender and flavorful it will become. Aim for at least 30 minutes, but overnight is ideal for the best results.
- Double-Dip for Extra Crispiness: For an even crunchier texture, dip the tenders back into the egg wash and then again into the panko breadcrumbs before frying.
- Maintain Oil Temperature: Ensure the oil is hot enough before adding the chicken to achieve that perfect golden crust. Use a thermometer to check the temperature; it should be around 350°F (175°C).
- Let Them Rest: After frying, allow the chicken tenders to rest on paper towels for a few minutes. This helps to keep them crispy by letting excess oil drain off.
Variations
Oven-Baked Crispy Chicken Tenders
If you want a healthier option, try oven-baking your chicken tenders. This method cuts down on oil while keeping the crunch. Preheat your oven to 425°F. First, coat the chicken tenders like usual. Then, place them on a baking sheet lined with parchment paper. Spray them lightly with cooking spray for added crispiness. Bake for 20-25 minutes, flipping halfway. Check for an internal temp of 165°F. You’ll enjoy a delicious meal with less grease!
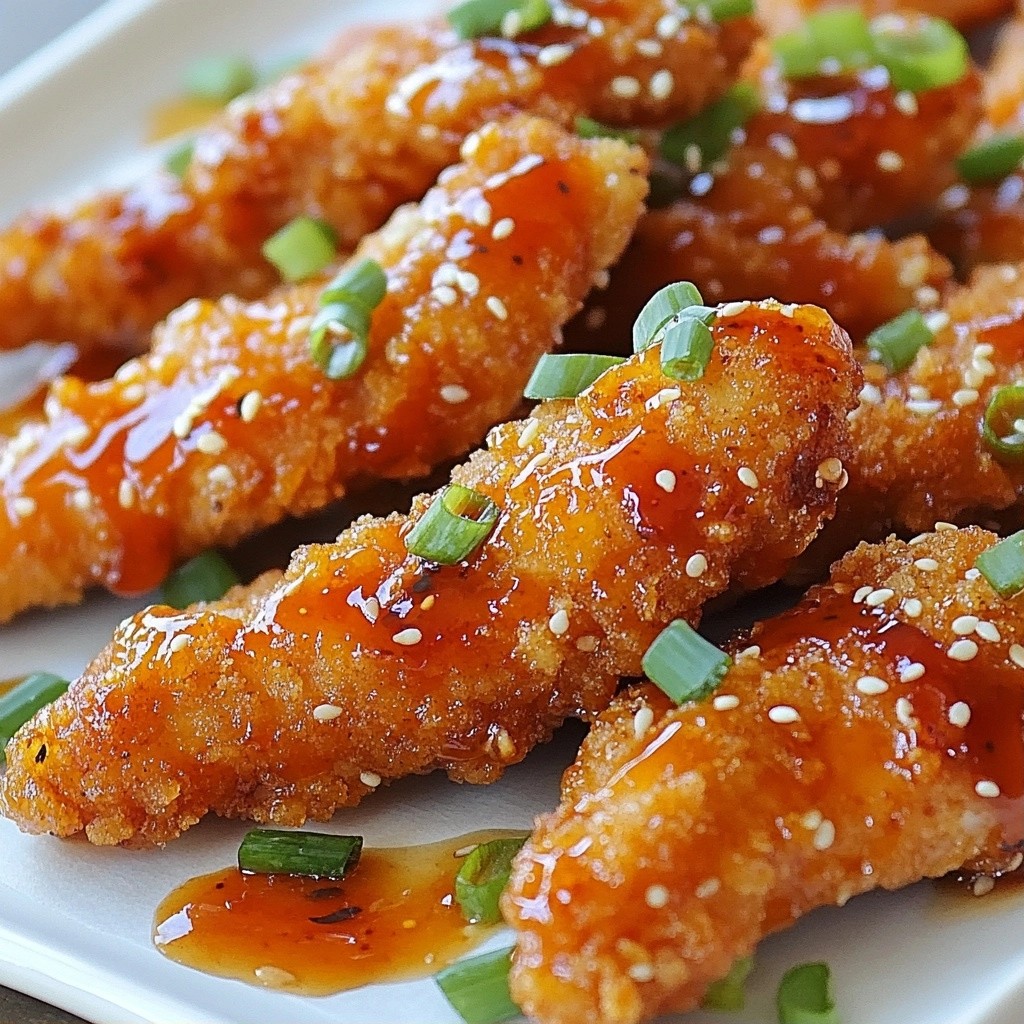
Different Dip Options
While the honey mustard dip is fantastic, you can mix it up. Here are other tasty dip ideas:
- BBQ Sauce: A classic that adds a smoky flavor.
- Ranch Dressing: Creamy and cool, it pairs well with crispy chicken.
- Buffalo Sauce: For those who love heat, this spicy option is a winner.
- Sweet Chili Sauce: A sweet and spicy dip that will excite your taste buds.
Try one or all to find your favorite!
Spicy Chicken Tenders Variation
For a kick, spice up your chicken tenders! Add cayenne pepper to the flour mixture. Adjust the amount to your taste. You can also marinate the tenders in hot sauce mixed with buttermilk. This gives them a zesty flavor. If you love heat, try serving with a spicy ranch dip or a chipotle mayo. These spicy variations will add a fun twist!
Storage Info
Storing Leftover Chicken Tenders
To store leftover chicken tenders, let them cool first. Place them in an airtight container. This keeps them fresh in your fridge for up to three days. Make sure to separate the tenders from the dip to keep both tasty.
Reheating Tips for Best Texture
When you reheat chicken tenders, aim for the oven. Preheat your oven to 375°F (190°C). Place the tenders on a baking sheet. Heat them for about 10-15 minutes. This helps them stay crispy. If you're in a hurry, you can use the microwave, but they may get soggy.
Freezing Chicken Tenders and Dip
You can freeze chicken tenders for a later snack. Let them cool, then wrap them in plastic wrap or foil. Place them in a freezer bag. They last in the freezer for up to three months. For the honey mustard dip, store it in a small container. It can freeze too, but it may change texture. Thaw both in the fridge before reheating or serving.
FAQs
Can I use chicken thighs instead of breasts?
Yes, you can use chicken thighs. They stay juicy and flavorful. Just cut them into strips like chicken breasts. Thighs may cook a bit quicker due to the fat content.
How do I make the chicken tenders gluten-free?
To make gluten-free chicken tenders, swap all-purpose flour for gluten-free flour. Use gluten-free panko breadcrumbs to keep the coating crispy. Make sure all other ingredients are gluten-free, too. This way, everyone can enjoy them.
Can I prepare the honey mustard dip in advance?
Yes, you can make the honey mustard dip ahead of time. Mix all ingredients and store it in the fridge. It tastes best if chilled for at least 30 minutes. This dip goes great with other dishes, too!
You’ve learned how to make chicken tenders at home, from the right ingredients to cooking tips. I covered marinating, coating, and frying for the best results. You also saw variations like spicy or oven-baked tenders that can suit anyone's taste. Remember, storing and reheating properly keeps them tasty. Enjoy experimenting with dips and flavors to make these tenders your own. With practice, you’ll master this dish and impress everyone.